In Excel, each worksheet is organized into a grid of rows, columns, and cells. Individual cells can also be grouped into ranges, which are just series of cells strung together. These items interact with each other to form the basic layout of an Excel document.
Cell addresses
Take a look at the below diagram, which shows rows, columns, cells, and ranges all in one place:
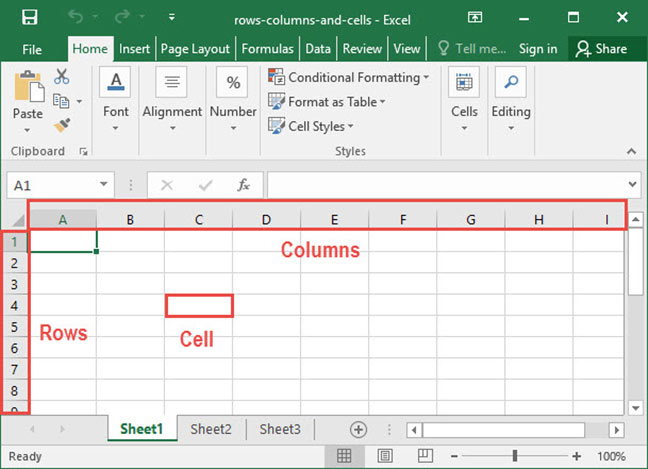
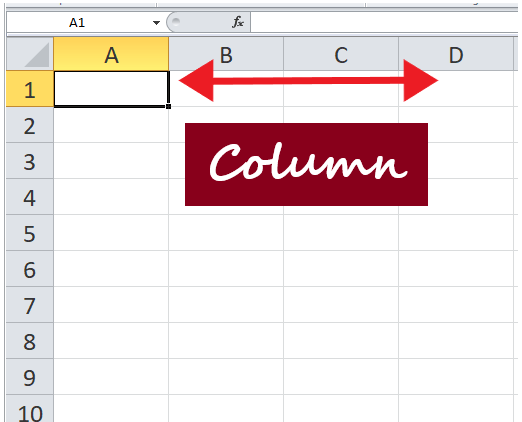
As you can see, Excel labels columns by letter. You can see column labels highlighted along the top of the screen: A, B, C, etc. Rows are highlighted along the side of the screen, and are organized by number: 1, 2, 3, etc.
At the intersection of each row and column is a cell, which is just one of the boxes on the grid of a worksheet. Each cell has a unique address, obtained by comining the column letter and the row number of the given cell. For example, cell B4 lies at the intersection of column B and row 4.
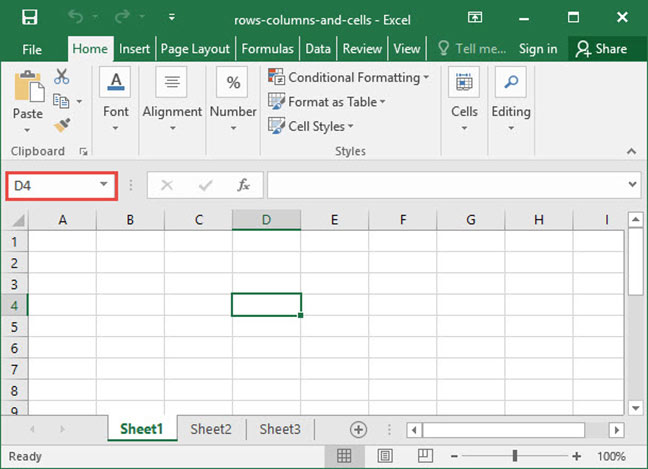
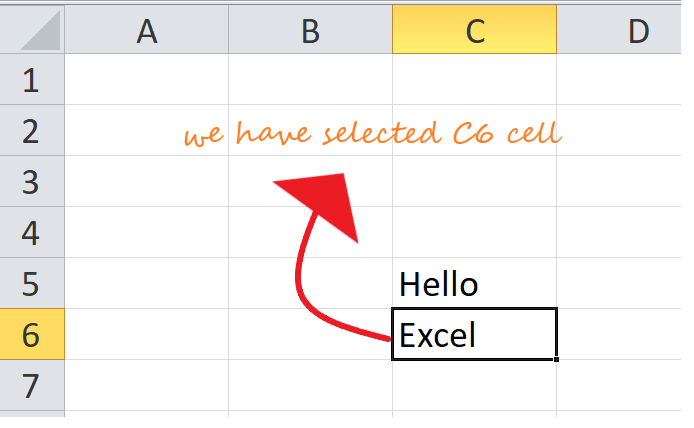
Whenever you select a cell, you’ll see its address appear in the cell address box directly above the labels columns A and B. You can also type a cell name into this box and press Enter to automatically zoom to a given cell.
Cell ranges
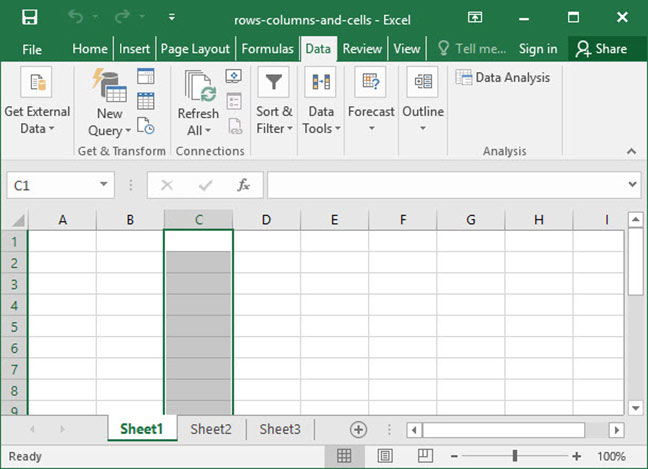
Multiple cells can be grouped into ranges, which are adjacent series of cells. Take, for example, the following screenshot:
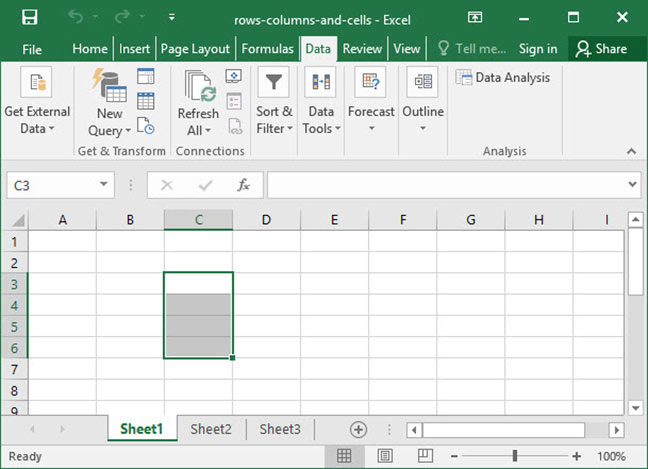
In this worksheet, we’ve highlighted the range of all cells between C3 and C6. When we want to talk about a range like this, we do so by using the colon (:) character between the first and last cells in the range, like so: C3:C6. This notation means «the range of all cells between C3 and C6».
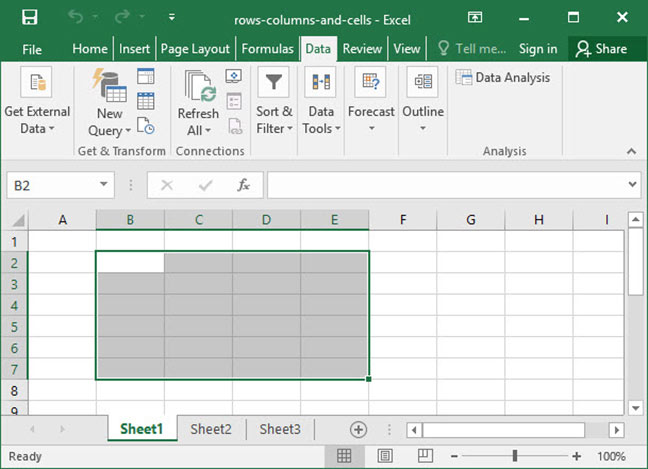
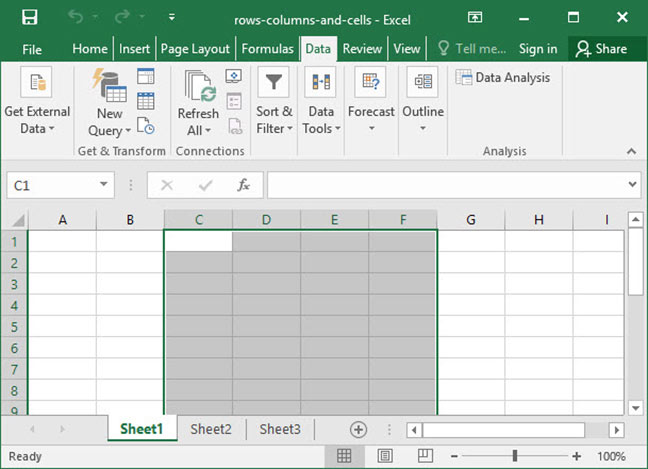
We can also talk about ranges that span multiple rows and columns, like B2:E7 below:
Manipulating rows and columns
There are many things you can do to manipulate a row or column; but before you can do to, you must select it.
To select a single row or column, click the label of that row or column at the left or top of the screen:
To select multiple rows or columns, click the label of one row or column and keep the mouse button held down, then drag over to select multiple:
To select all rows and all columns in a worksheet, click the small box that appears at the intersection of row 1 and column A:

Once you have rows or columns selected, right click their labels to bring up the row / column manipulation menu, which appears in the screenshot below.
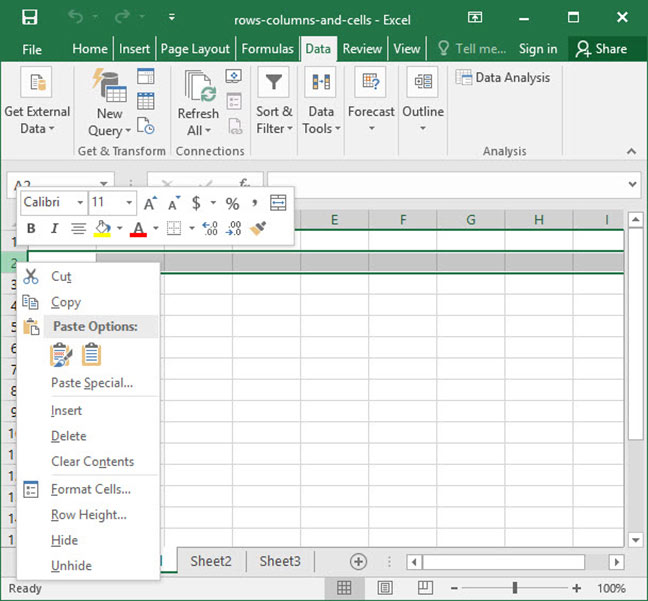
This menu has a variety of functions, and will allow you to do any of the following:
- Cut / copy / paste rows or columns. Use this if you would like to duplicate rows or columns, or if you would like to rearrange their order.
- Insert new rows or columns. This will insert new rows above — or new columns to the left of — the row or column you have selected.
- Delete rows or columns. This will delete the rows or columns in question entirely and collapse the remainder of the sheet in to take the place of the removed row or column.
- Format rows or columns. Use this option to apply formatting to each cell within a row or column. Potential formatting options include text colors, background colors, and borders.
- Hide and unhide rows or columns. Use this option to temporarily hide or unhide rows or columns. This makes it easier to manage large spreadsheets by hiding non-critical data.
You can also resize a row or column by hovering your mouse over the divider between two rows or two columns, then clicking and dragging to expand or contract it.
Manipulating cells
Cells can be manipulated just like rows and columns. To do so, select a cell or range, then right click. The cell manipulation menu will appear.
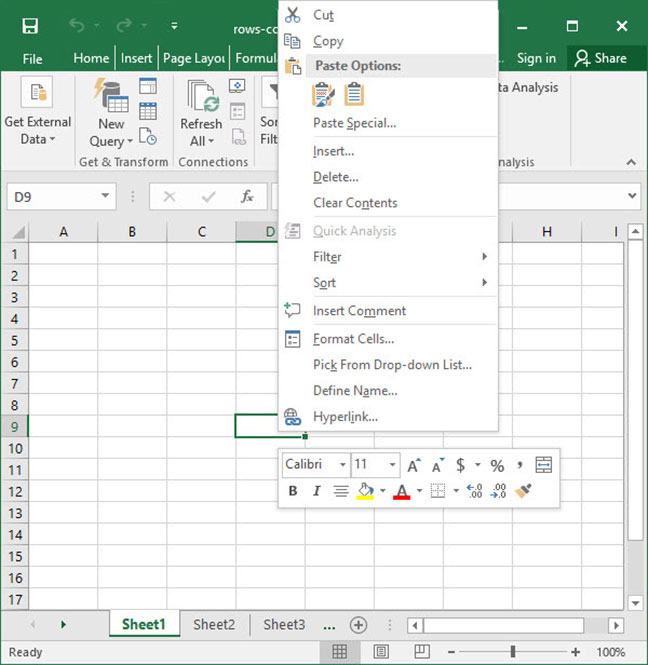
This menu allows you to:
- Cut / copy / paste cells. Use this to duplicate cells from one place in your worksheet to another.
- Insert new cells. Note that when you insert a cell, you’ll have to tell Excel how to do it (you must either shift rows or columns in the existing sheet to accomodate the new cell).
- Delete cells. Like insertion, deletion also causes a shift in your sheet. Excel will ask you where you want cells to shift when you delete a cell.
- Format cells. Use this option to apply formatting to each cell. Potential formatting options include text colors, background colors, and borders.
Those are the basics of row, column, and cell manipulation in Excel. There’s much more to learn — we’ve only scratched the surface! — but you should now have a solid foundation on which to build. Questions or comments? Let us know below!
Explore the 5 must-learn ‘fundamentals’ of Excel
Getting started with Excel is easy. Sign up for our 5-day mini-course to receive easy-to-follow lessons on using basic spreadsheets.
- The basics of rows, columns, and cells…
- How to sort and filter data like a pro…
- Plus, we’ll reveal why formulas and cell references are so important and how to use them…
Comments
Worksheets in Excel
While working with Excel, often you come across terms worksheet, Rows, Columns and Cells. In this tutorial we will briefly understand these terms along with their fundamentals and the operation (create, copy, paste, delete, etc) performed in them.
Worksheet
A Worksheet is a single page containing a collection of cells where the user can store, update and manipulate the data. Worksheet is also called a spreadsheet. It is made up of rows, columns and cells.
NOTE: An Excel workbook can contain several worksheets.

In Excel, individual data cells in a worksheet are defined and organized with the help of the vertical column and horizontal row that are combined to form a cell reference, unlike A1, B25, or R867.
The specifications for Excel Worksheet current versions include:
- Number of Rows per Worksheet: 1,048,576
- Number of Rows per Worksheet: 16,384
- Total cells per Worksheet: 17,179,869,184
Select a Worksheet
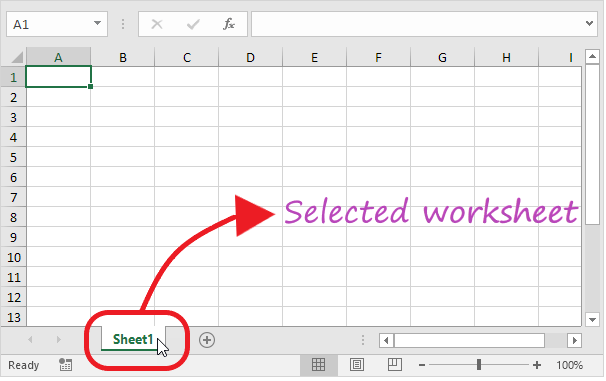
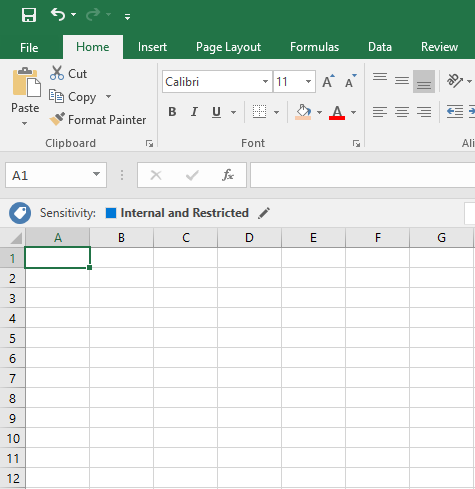
Whenever you open an Excel workbook, by default, Excel will take you to the Sheet1 worksheet. As you can see in the below image, the name of the worksheet ‘Sheet1’ is displayed on its sheet tab at the bottom of the windowpane. Though you can rename it anytime, we will cover the steps down in this tutorial.
Insert a Worksheet
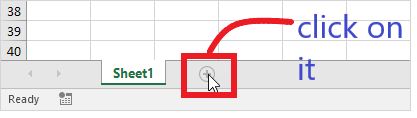
Excel enables the user to insert multiple worksheets as per their requirement. To insert a new worksheet in excel, click on the plus (+) symbol located at the bottom of the windowpane. By default, the new worksheet will be named ‘SheetN’ where N represents an integer number 1,2,3,4,5,6,7,…., n.
In the below example, we have added a new worksheet named Sheet2.
Output

Rename a Worksheet
To rename your worksheet with a customized and appropriate name following the below steps.
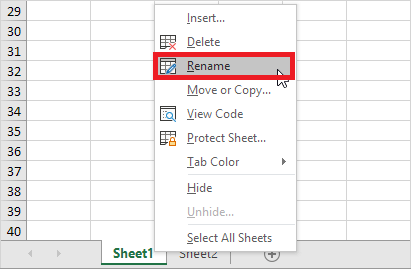
- Right-click on the sheet tab for which you wish to change the name.
- The toolbar window will appear. Choose the Rename option.

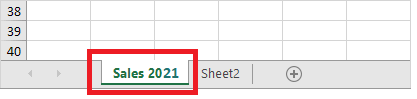
- Type your preferred name. For instance, in the below screenshot, we have renamed ‘Sheet1’ to Sales 2021.
Move a Worksheet
Excel allows the user to move and locate their worksheet in any order. Click on your worksheet sheet tab and drag it to your preferred location.
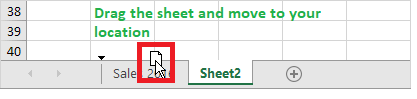
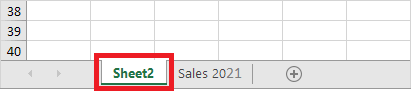
For instance, in the below example, we have dragged Sales 2021 before the ‘Sheet 2’ sheet tab.
Output
Delete a Worksheet
Deleting a worksheet in excel is very simple, follow the below steps:
- Scroll down to the bottom and right click on a sheet tab.
- The dialog box will appear. Click on delete
- The sheet will be immediately deleted.


Copy a Worksheet
While working many times, the Excel users require copying and pasting the data of one worksheet to another and making some changes. Excel provides easy steps to copy the data of one worksheet to another.
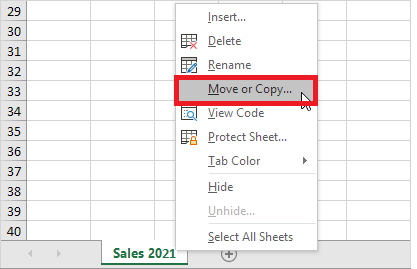
- Right-click on the sheet tab that you want to copy.
- The toolbar window will appear. Click on the ‘Move or Copy’ option.
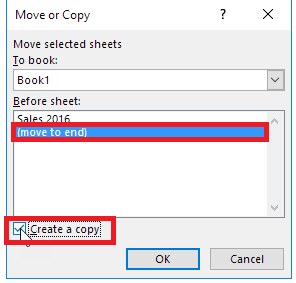
- The ‘Move or Copy’ dialog box will be displayed. In the Before Sheet section, select the ‘move to end’ option and make sure to check in the ‘create a copy’.
- Click OK. Your data will be copied to the new worksheet.
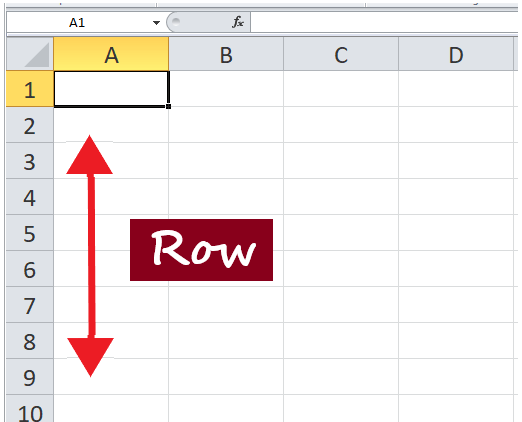
Rows run horizontally across the worksheet ranging from 1 to 1048576. A row is identified by the number on the left side of the row, from where the row originates.
Insert a Row in Excel
Many Excel users often need to insert a row in the worksheet to organize or manipulate their data.
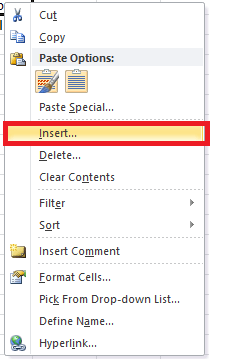
- Select and right-click on the cell within the row where you want to insert a new row.
- The dialog box will be displayed. Choose Insert.
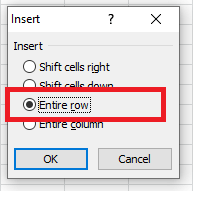
- The insert dialog box will appear. Choose the ‘Entire row’
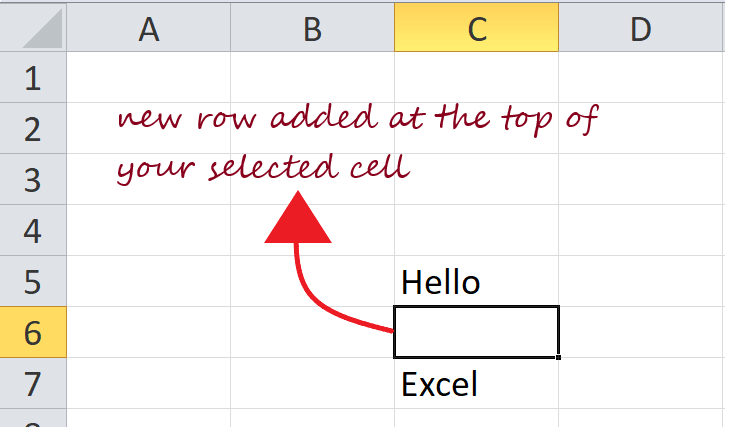
- It will insert a new row at the top of your selected cell.

Delete a Row in Excel
While working with Excel users need to delete a row in the worksheet to organize or manipulate their data. It’s a lot easier to delete a row in excel.
- Select any cell within the row that you need to delete. Right-click on the cell.
- The dialog box will be displayed. Choose Delete.
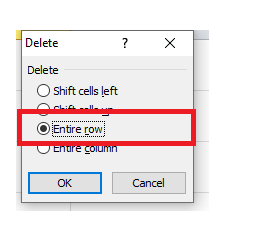
- The Delete dialog box will appear. Choose the ‘entire row‘ option.
- The entire row will be immediately deleted.


COLUMNS
Columns run vertically downward across the worksheet ranging from A to XFD (in total 16384 columns). A column is identified by a column header on the top of the column, from where the column originates.
Insert a Column in Excel
Many Excel users often need to insert a column in the worksheet to organize or manipulate their data.
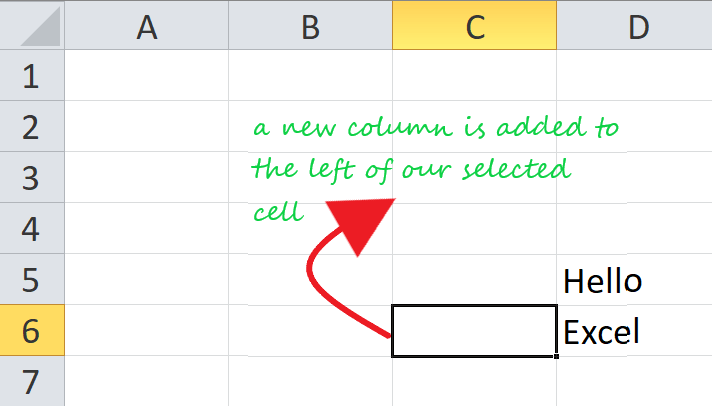
- Select and right-click on the cell within the column where you want to insert a new column.
- The dialog box will be displayed. Choose Insert.
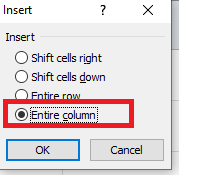
- The insert dialog box will appear. Choose the ‘Entire column’
- It will insert a new column at the left of your selected cell.

CELLS
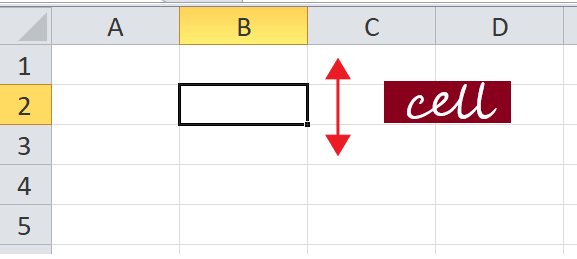
Cells are small rectangular boxes in the worksheet where we enter data. A cell is the intersection of a row and column. It is identified by row number and column header. In Excel, each cell is identified using a set of coordinates or positions, such as A1 (where A represents a column and 1 represents the row), B2, or M16.
You can perform several operations with cells in Excel, unlike changing the font style, font size, background color, text alignment, format painter, wrap text, and conditional formatting.
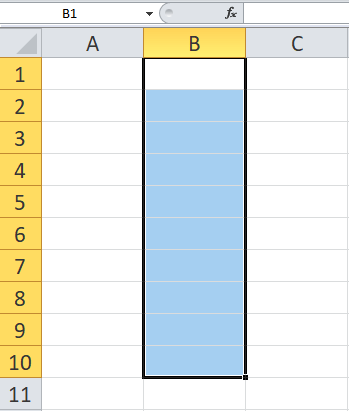
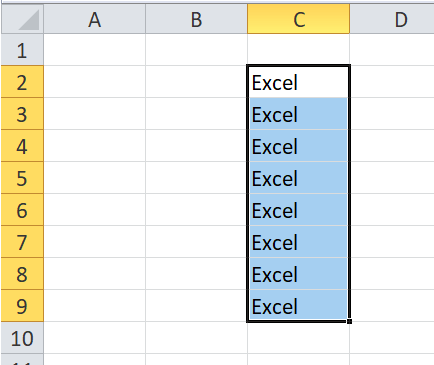
Excel provides the feature to select multiple cells at one time. A group of selected cells is collectively known as cell range. With cell range instead of a single cell address, the user refers to a cell range utilizing the cell addresses of the selected first and last cells, separated by a colon. For instance, a cell range covering B2, B3, B4, B5, B6, B7, B8, B9, and B10 would be addressed as B1:B10.
Cell Range: B1: B10
Now, as we have covered the basics, let’s move towards the operation that could be applied to a cell.
Select a cell
To perform any operation, i.e., to write, edit, delete, format, the user must first select a cell. Below given are the steps to select a cell in Excel:
- With the help of your cursor, click on any cell.
- Your cell is now selected, and you will notice a rectangular borderaround the same cell, and the column and the row heading will be highlighted.
- The cell will remain selectedunless and until the user points the cursor to another cell.
Select cell range
- Click on the first cell from which to start the selection. Hold and drag your cursor to the last adjoining cells where you want to end the cell range.
- Once done, release the cursor, and the desired cell range would be selected.
- The cell will remain selectedunless and until the user points the cursor to another cell.

Cell content
Any data you enter in your Excel worksheet is stored in a cell. Each cell can hold various types of information, including string, numbers, formatting, formulas, and functions.
1. String (Text)
Cells can hold string values, unlike alphabets, numbers, and dates.
2. Formatting properties
Cells also include formatting properties that improve the appearance of your cell content. For instance, percentages can be displayed as 0.55 or 55%. You can make the cell content in Bold, Italics, change its font color, font size, or change its background color.
3. Formulas and functions
Cells can include predefined or customized formulas and functions that are helpful in calculations. For example, SUM(A2:A5) will add the number stored in each cell and give you the output.
Insert content to a cell
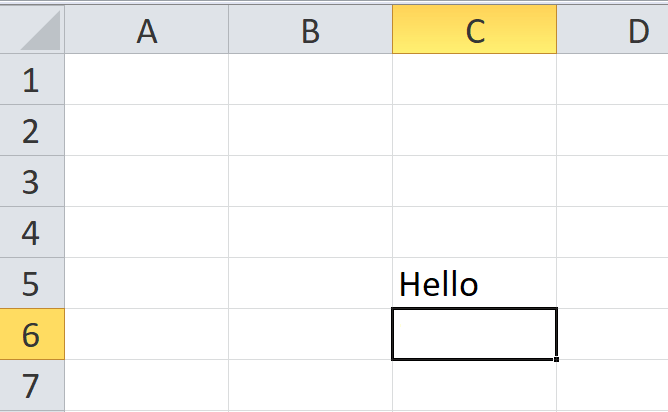
- Click and select the cellwhere you want to insert the content.
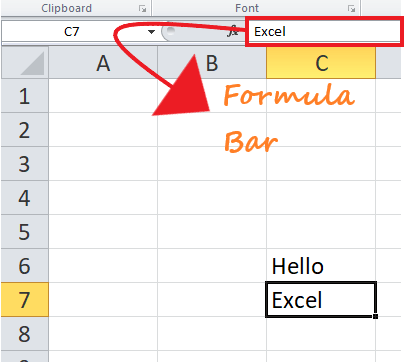
- Type in the desired data into the selected cell, then click the enter button or move your cursor to another cell. The content will be shown in the cell and the formula bar.

Delete cell content
- Click and select the cell.
- To delete the cell content, press the Delete or Backspace key from your keyboard.
- If you want to delete multiple cells, select the cell range and press the Delete key.

Note: Delete Key can delete the content of multiple cells at once, whereas the Backspace key only deletes the data of a single cell at a time.
Delete cell(s)
People often get confused between deleting the cell content and deleting the cell itself, but there is a significant difference. If you delete the content, the cell will remain, and only the content gets omitted, whereas if you delete the cell, the cells below shift up or are shifted left and replace the deleted cell.
- Click and select the cell(s).
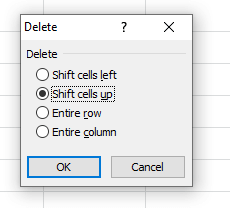
- Right-click on the cell. The dialog box will be displayed. Choose Delete.
- The given below Delete dialog box will occur. Choose the ‘entire row’ option.
- The cell will be immediately deleted and the cells lying below will shift up.


Drag and drop cells
Instead of copying and pasting the data, you can use the drag and drop option to move cell content from one cell to another.
- Click and select the cell(s).
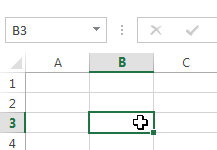
- Point your cursor over the border of the selected cell(s) till it changes to a black cross with four arrows.
- Drag your mouse cursor to the cell you prefer to paste the content. At this point the mouse pointer will change to a dotted rectangle.
- Release the cursor, and the content will be cut from the original cell and pasted in the selected location.


Insert or delete rows and columns
Insert and delete rows and columns to organize your worksheet better.

Note: Microsoft Excel has the following column and row limits: 16,384 columns wide by 1,048,576 rows tall.
Insert or delete a column
-
Select any cell within the column, then go to Home > Insert > Insert Sheet Columns or Delete Sheet Columns.
-
Alternatively, right-click the top of the column, and then select Insert or Delete.
Insert or delete a row
-
Select any cell within the row, then go to Home > Insert > Insert Sheet Rows or Delete Sheet Rows.
-
Alternatively, right-click the row number, and then select Insert or Delete.
Formatting options
When you select a row or column that has formatting applied, that formatting will be transferred to a new row or column that you insert. If you don’t want the formatting to be applied, you can select the Insert Options button after you insert, and choose from one of the options as follows:
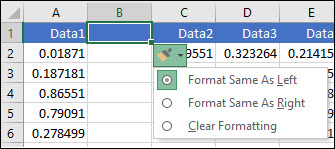
If the Insert Options button isn’t visible, then go to File > Options > Advanced > in the Cut, copy and paste group, check the Show Insert Options buttons option.
Insert rows
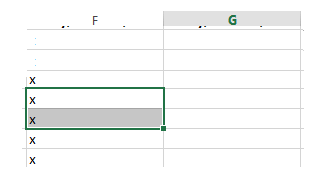
To insert a single row: Right-click the whole row above which you want to insert the new row, and then select Insert Rows.
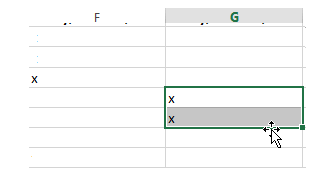
To insert multiple rows: Select the same number of rows above which you want to add new ones. Right-click the selection, and then select Insert Rows.
Insert columns
To insert a single column: Right-click the whole column to the right of where you want to add the new column, and then select Insert Columns.
To insert multiple columns: Select the same number of columns to the right of where you want to add new ones. Right-click the selection, and then select Insert Columns.
Delete cells, rows, or columns
If you don’t need any of the existing cells, rows or columns, here’s how to delete them:
-
Select the cells, rows, or columns that you want to delete.
-
Right-click, and then select the appropriate delete option, for example, Delete Cells & Shift Up, Delete Cells & Shift Left, Delete Rows, or Delete Columns.
When you delete rows or columns, other rows or columns automatically shift up or to the left.
Tip: If you change your mind right after you deleted a cell, row, or column, just press Ctrl+Z to restore it.
Insert cells
To insert a single cell:
-
Right-click the cell above which you want to insert a new cell.
-
Select Insert, and then select Cells & Shift Down.
To insert multiple cells:
-
Select the same number of cells above which you want to add the new ones.
-
Right-click the selection, and then select Insert > Cells & Shift Down.
Need more help?
You can always ask an expert in the Excel Tech Community or get support in the Answers community.
See Also
Basic tasks in Excel
Overview of formulas in Excel
Need more help?
Want more options?
Explore subscription benefits, browse training courses, learn how to secure your device, and more.
Communities help you ask and answer questions, give feedback, and hear from experts with rich knowledge.
Difference Between Excel Rows and Columns
Rows and columns are two different properties in Excel that make up a cell, range, or table together. In general terms, the vertical portion of the Excel worksheet is known as columns. For example, there can be 256 of them in a worksheet. The horizontal portion of the worksheet is known as rows. For example, there can be 1,048,576 of them.
Excel is the cobweb of rows and columns. Each adjacent row and column is termed a cell. A worksheet consists of millions of such cells that can gather and record its data. The main aim of using Excel is to plot the data in it as per the requirement and manipulate the same to obtain a fruitful analysis.
Table of contents
- Difference Between Excel Rows and Columns
- Excel Rows vs Columns Infographics
- Key Differences
- Comparative Table
- Conclusion
- Recommended Articles
- Excel rows and columns are two different characteristics that combine to create a table or cell.
- Millions of these cells comprise a worksheet, which may collect and store data. Excel is mostly used to plot data according to specifications and edit that data to produce insightful analyses.
- Rows represent numerical value, whereas columns represent alphabets.
- On average, there are a total number of 1,048,576 rows and 16,384 numbers of columns.
You are free to use this image on your website, templates, etc, Please provide us with an attribution linkArticle Link to be Hyperlinked
For eg:
Source: Excel Rows vs Columns (wallstreetmojo.com)
The corporates have high dependability on Excel to perform their day-to-day business decisions and run their daily operations. This article will discuss the top differences between excel rows and columnsA cell is the intersection of rows and columns. Rows and columns make the software that is called excel. The area of excel worksheet is divided into rows and columns and at any point in time, if we want to refer a particular location of this area, we need to refer a cell.read more.
- A row is a horizontal line of cells. Each row has a unique number that identifies it.
- A column is a vertical line of cells. Each column has a special letter that identifies it.
Let us understand this with an example:
The leftmost column is A, and the next column is B. In addition, the topmost row is 1, and the next row is 2. The adjacent top row creates the cell, and the leftmost Column is A1, as reflected in the figure.
Excel Rows vs Columns Infographics

You are free to use this image on your website, templates, etc, Please provide us with an attribution linkArticle Link to be Hyperlinked
For eg:
Source: Excel Rows vs Columns (wallstreetmojo.com)
Key Differences
- Rows are the horizontal lines in the worksheet, and columns are the vertical lines in the worksheet.
- In the worksheet, the total rows are 10,48,576, while the total columns are 16,384.
- In the worksheet, rows range from 1 to 1,048,576, while columns range from A to XFD.
- To select an entire specific row, press “Shift + Spacebar.” To select the whole column, press “Ctrl+ Spacebar.”
- To hide any row, select the entire row and press right click and then hide, while to hide any column in excelThe methods to hide columns in excel are — hide columns using right-click option, hide columns using shortcut cut key, hide columns using column width, hide columns using VBA code.read more, select the whole column, press right-click, and then “Hide.”
- To unhide any hidden row, select one entire row above and one below the hidden row, then right-click and choose “Unhide.” To unhide any hidden excel columnUsing the Home tab of the Excel ribbon, using the shortcut key, using the context menu, altering the column width, using the ctrl+G (go to) command, and using the ctrl+F (find) command are some of the ways to unhide a column in Excel.read more, choose one entire column to the left and one to the right of the hidden column, then right-click and select “Unhide.”
- The default row height is 18.75 pt. and 25 pixels, while the default width of the column is 8.43 pt. and 64 pixels.
- To freeze any row, put the active cell below the row one wants to freeze and then press “Alt+W+F+R.” To freeze any column, set the active cell adjacent to the column one wants to freeze, and then press “Alt+W+F+C.”
Comparative Table
| Basis | Excel Rows | Excel Columns |
|---|---|---|
| Definition | A row is a horizontal line of cells. | A column is a vertical line of cells. |
| Labeling | Numeric values represent rows. | Alphabets represent columns. |
| Number | In Microsoft Offside 10, there are a total of 1,048,576 rows. | In Microsoft office 10, there are 16,384 numbers of columns. |
| Range | Rows range from 1 to 1,048,576. | Columns range from A to XFD. |
| Select all rows | To select an entire row, click over any cell in the particular row and press “Shift + Spacebar.” | To select an entire column, click over any cell in the specific column and press “Ctrl + Spacebar.” |
| To Select Several Rows | If you want to select several adjacent rows, select a range that includes cells of all the rows you want to select, then press “Shift + Spacebar.” For example, suppose you want to select “Row 3 to Row 10.” First, you need to choose at least one cell in each row from “Row 3 to Row 10.” Next, press “Shift + Spacebar” to select the desired rows. | If you want to select several adjacent columns, choose a range that includes cells of all the columns you want to select, then press the “Ctrl + Spacebar.” For example, suppose you want to select “Column C to Column F,” you need to choose at least one cell in each column from “Column C to Column F.” Next, press “Ctrl + Spacebar” to select all the desired columns. |
| Differences Function | The row differences command compares the cells in the selected range with those in the same column as the active cells. | The column differences command compares the cells in the selected range with those in the same rows as the active cells. |
| To Hide Row/column | Select the row(s) you want to hide, right-click and select “Hide.” | Select the column(s) you wish to hide, right-click, and select “Hide.” |
| To Unhide the hidden row/column | Select one entire row above and one below the hidden row, then right-click and choose “Unhide.” | Select one entire column to the left and one to the right of the hidden column, then right-click and select “Unhide.” |
| The default height and width of rows and columns | The default height of the row is 18.75 pt. and 25 pixels. | The default width of the column is 8.43 pt. and 64 pixels. |
| To Auto fit the content. | To AutoFit the content in a row, double-click the bottom border of the underlying row. | To AutoFit the content in the column, double-click the right border of the underlying column. |
| In Index functionThe INDEX function in Excel helps extract the value of a cell, which is within a specified array (range) and, at the intersection of the stated row and column numbers.read more | row_num: Specifies the row number in the array from which the resulting value is to be returned. | Col_num: Specifies the column number in the arrays in excelArray formulas are extremely helpful and powerful formulas that are used in Excel to execute some of the most complex calculations. There are two types of array formulas: one that returns a single result and the other that returns multiple results.read more from which the resulting value is to be returned. |
| To Freeze Row/Column | To freeze any specific row, press “Alt+W+F+R.” | To freeze any particular column, press “Alt+W+F+C.” |
| In Lookup Function | HLOOKUP compares the data from row to row in the LOOKUP function. | In the Lookup function inThe LOOKUP excel function searches a value in a range (single row or single column) and returns a corresponding match from the same position of another range (single row or single column). The corresponding match is a piece of information associated with the value being searched. read more in excel, VlookupThe VLOOKUP excel function searches for a particular value and returns a corresponding match based on a unique identifier. A unique identifier is uniquely associated with all the records of the database. For instance, employee ID, student roll number, customer contact number, seller email address, etc., are unique identifiers. read more compares the data from column to Column. |
Conclusion
Excel spreadsheets have huge potential based on the data feed in the rows and columns. And accordingly, the same is utilized in various functions in the corporate world. Moreover, users prepare several data models based on the requirements that give them automated results and enhance analytical skills.
Recommended Articles
This article is a guide to Excel Rows vs. Columns. We discuss the top differences between Excel rows, columns, infographics, and a comparison table. You may also look at the following articles: –
- Excel vs. Google Sheets – Compare
- Excel vs. Access
- VLOOKUP with Two Criteria
- What is Database in Excel?
Reader Interactions
Rows and Column in Excel (Table of Contents)
- Introduction to Rows and Column in Excel
- Rows and Column Navigation in excel
- How to Select Rows and Column in excel?
- Adjusting Column Width
Introduction to Rows and Column in Excel
In Microsoft excel, if we open a new workbook, we can see that sheet will contain tables with light grey color. Basically excel is a tabular format which contains n number of rows and columns, where rows in excel will be in a horizontal line, and column in excel will be in a vertical line.
- In excel, we can find each row by its row number, which is shown in the below screenshot, which shows vertical numbers on the left side of each sheet.
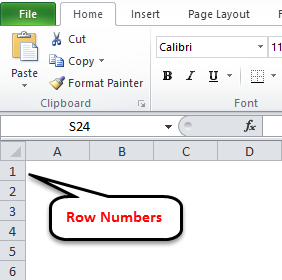
- As we can see in the above screenshot that each row can be identified by their row numbers like 1, 2, 3 etc.
- Whereas we can find the column in excel, which can be identified by the column header like A, B, C. which will be shown normally in all excel sheets, which are shown below.
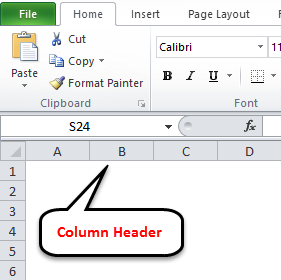
- In Excel, each column is named by its header, which shows the column header horizontally at the top of the excel sheet.
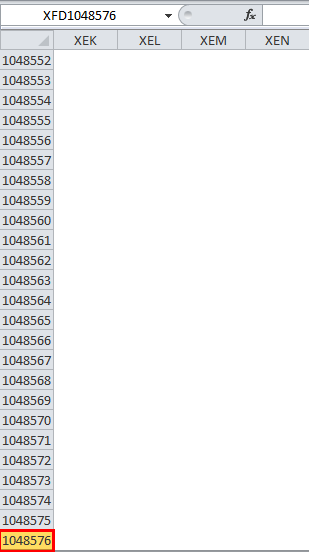
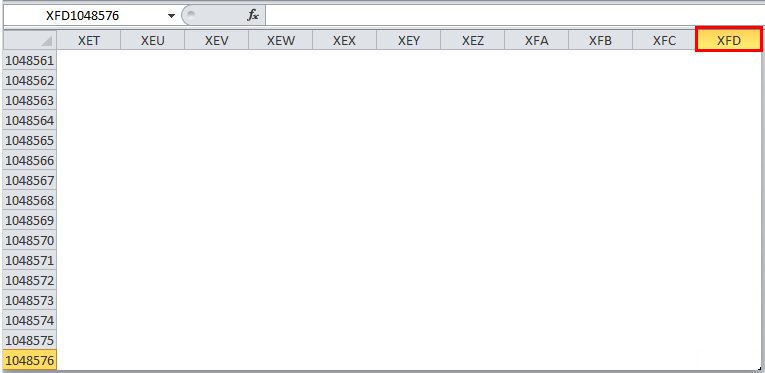
In Microsoft Excel 2010 and the latest version, we have row numbers ranging from 1 to 1048576 in 1048576, whereas the column ranges from A to XFD in a total of 16384 columns which is shown in the below screenshot.
Rows in excel range from 1 to 1048576, which is highlighted in red mark
The column in excel ranges from A to XFD, which is highlighted in red mark.
Rows and Column Navigation in excel
In this example, we will see how to navigate rows and columns with the below examples.
We can find the last row of excel by using the keyboard shortcut key CTRL+DOWN NAVIGATION ARROW KEY, or else we can use the vertical scrollbars to go to the end of the row.
We can find the last column of excel by using the CTRL+RIGHT NAVIGATION ARROW KEY, or else we can use the horizontal scrollbars to go to the end of the column.
How to Select Rows and Column in excel?
In this example, we will learn how to select the rows and columns in excel.
You can download this Rows and Column Excel Template here – Rows and Column Excel Template
Rows and Column in Excel – Example#1
Normally, when we open a workbook, we can see that sheet contains tabular rows and columns where each row is specified by their row number and column specified by their column header.
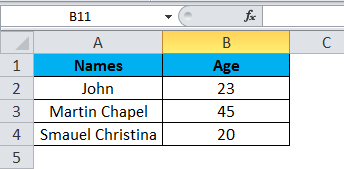
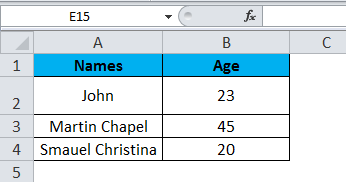
Consider the below example, which has some data in an excel sheet. Here we will see how to select the rows and columns.
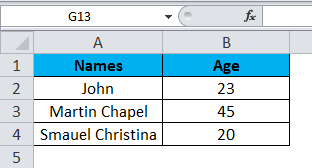
In the above screenshot, we can see that names and age column have their own header name A and B, and each row has its own row number.
In excel, each time when we select a row or column, “Name Box” will display the specific row number and column name, which is shown in the below screenshot.
In this example, we will select the Names and Age, and let’s see how the rows and column header is getting displayed.
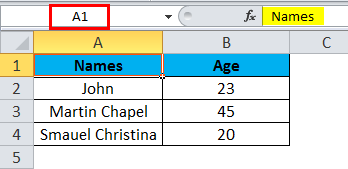
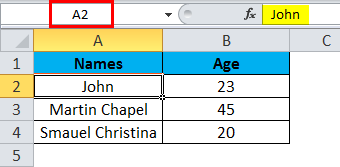
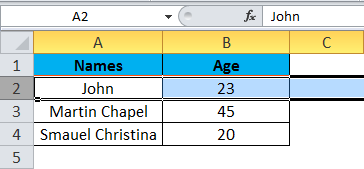
Step 1 – First, select the cell Name John.
Step 2 – Once you select the cell name, John, we will get the row number and column name as A2 in the name box, which means that we have selected A column second row as A2, shown below screenshot with yellow highlighted.
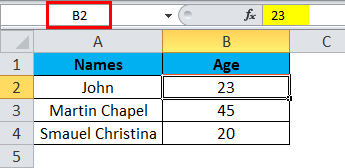
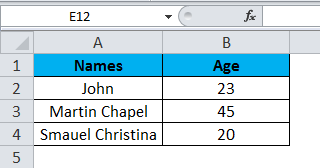
Step 3 – Now select cell 23, where it will show the selected cell is B2 which is shown in the below screenshot with yellow highlighted.
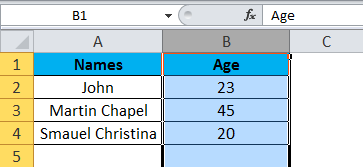
Step 4 – Now select all the names and columns to show that we have 4 rows and 2 columns shown in the below screenshot.
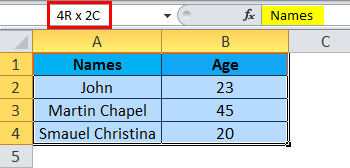
In this way, we can identify the row number and column name by selecting each cell in excel.
Example#2 – Changing Row and Column Size
This example shows how to change the row and column size by using the following examples.
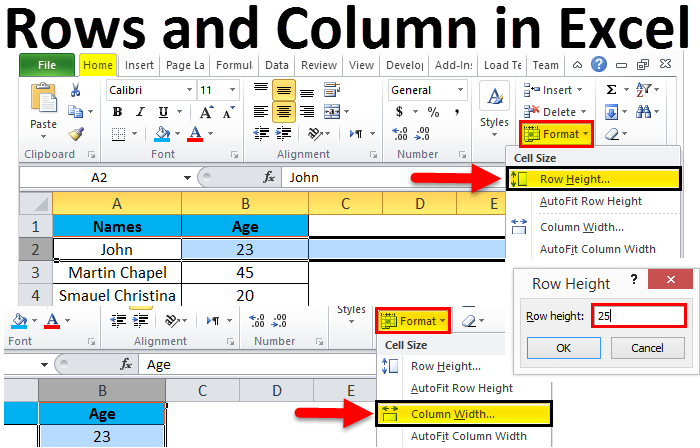
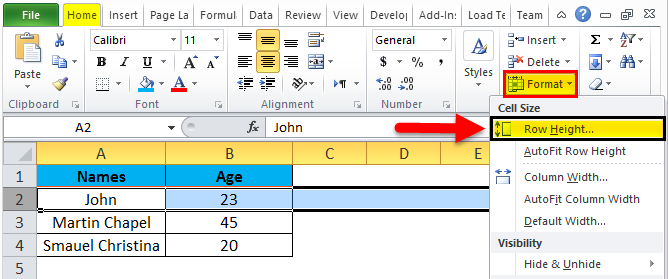
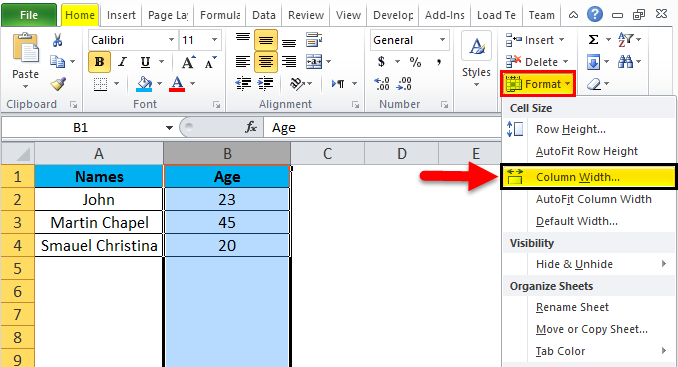
Excel row and column width size can be modified by using the format option in the HOME menu, which is shown below.
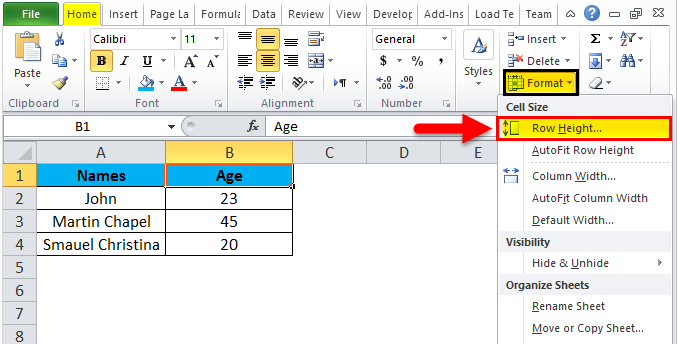
Using the format menu, we can change the row and column width where we have the list option, which are as follows:
- ROW HEIGHT– This is used to adjust the row height.
- AUTOFIT ROW HEIGHT– This will automatically adjust the row height.
- COLUMN WIDTH – This is used to adjust column width.
- AUTOFIT COLUMN WIDTH– This will automatically adjust the column width.
Let’s consider the below example to change the row and column width. Follow the below steps.
Step 1 – First, select the second row as shown in the below screenshot.
Step 2 – Go to the Format menu and click on ROW HEIGHT, as shown below.
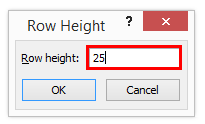
Step 3 – Once we select the ROW HEIGHT, we will get the below dialog box to change the height of the row.
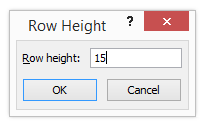
Step 4 – Now increase the row height to 25 so that the selected row height will get increased, as shown in the below screenshot.
We can see that row height has been increased when compared to the previous one; alternatively, we can change the row height by using the mouse.
Step 5 – Now go to the second option in the format list called AUTOFIT ROW HEIGHT, which will automatically reset the row to its original height.
Step 6 – Select the same row and go to the Format menu.
Step 7 – Now select the “AutoFit Row Height” as shown below.

Once we click on the “AutoFit Row Height” option, the row height will reset to the original position, shown below.
Adjusting Column Width
We can adjust the column width in the same way by using the format option.
Step 1 – First, click on the cell B cell as shown below.
Step 2 – Now go to the Format menu and click on column width as shown in the below screenshot.
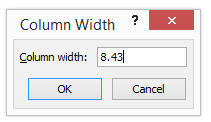
Once we click on the Column width, we will get the below dialog box to increase the column width, as shown below.
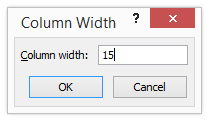
Step 3 – Now increase the column width by 15 to increase the selected column width.
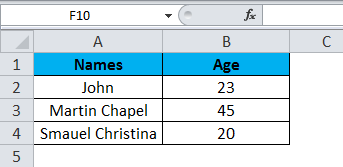
In the above screenshot, we can see that column width has been increased; alternatively, we can adjust the column width by using the mouse where if we place the mouse cursor, we will get the + plus mark sign near to the column.
Step 4 – Now click on the next option called “AutoFit Column width”. So that the selected column will get reset to its original size, which is shown below.
Things to Remember
- In excel, we can delete and insert multiple rows and columns.
- We can hide the specific row and columns using the hide option.
- Row and column cells can be protected by locking the specific cells.
Recommended Articles
This has been a guide to Rows and Columns in Excel. Here we also discuss Rows and Columns in Excel along with practical examples and downloadable excel template. You can also go through our other suggested articles –
- Excel Compare Two Columns
- Unhide Columns in Excel
- Sort Columns in Excel
- Excel Columns to Rows