类微信界面
最新推荐文章于 2024-06-21 15:12:56 发布

ikun头子
 最新推荐文章于 2024-06-21 15:12:56 发布
 阅读量539
 收藏
1
收藏
1
 点赞数
点赞数
最新推荐文章于 2024-06-21 15:12:56 发布
阅读量539
收藏
1

 点赞数
点赞数
一.开发主题
做一个类微信界面可以点击切换页面的
二设计流程
1.做一个top.xml
代码
<inearLayout
    android:id="@+id/linearLayout"
    android:layout_width="match_parent"
    android:layout_height="65dp"
    android:gravity="center"
    android:orientation="vertical"
    app:layout_constraintEnd_toEndOf="parent"
    app:layout_constraintStart_toStartOf="parent"
    app:layout_constraintTop_toTopOf="parent">

    <TextView
        android:id="@+id/textView"
        android:layout_width="wrap_content"
        android:layout_height="wrap_content"
        android:layout_gravity="center_horizontal"
        android:layout_weight="1"
        android:text="Wechat"
        android:textSize="40sp"/>
</LinearLayout>
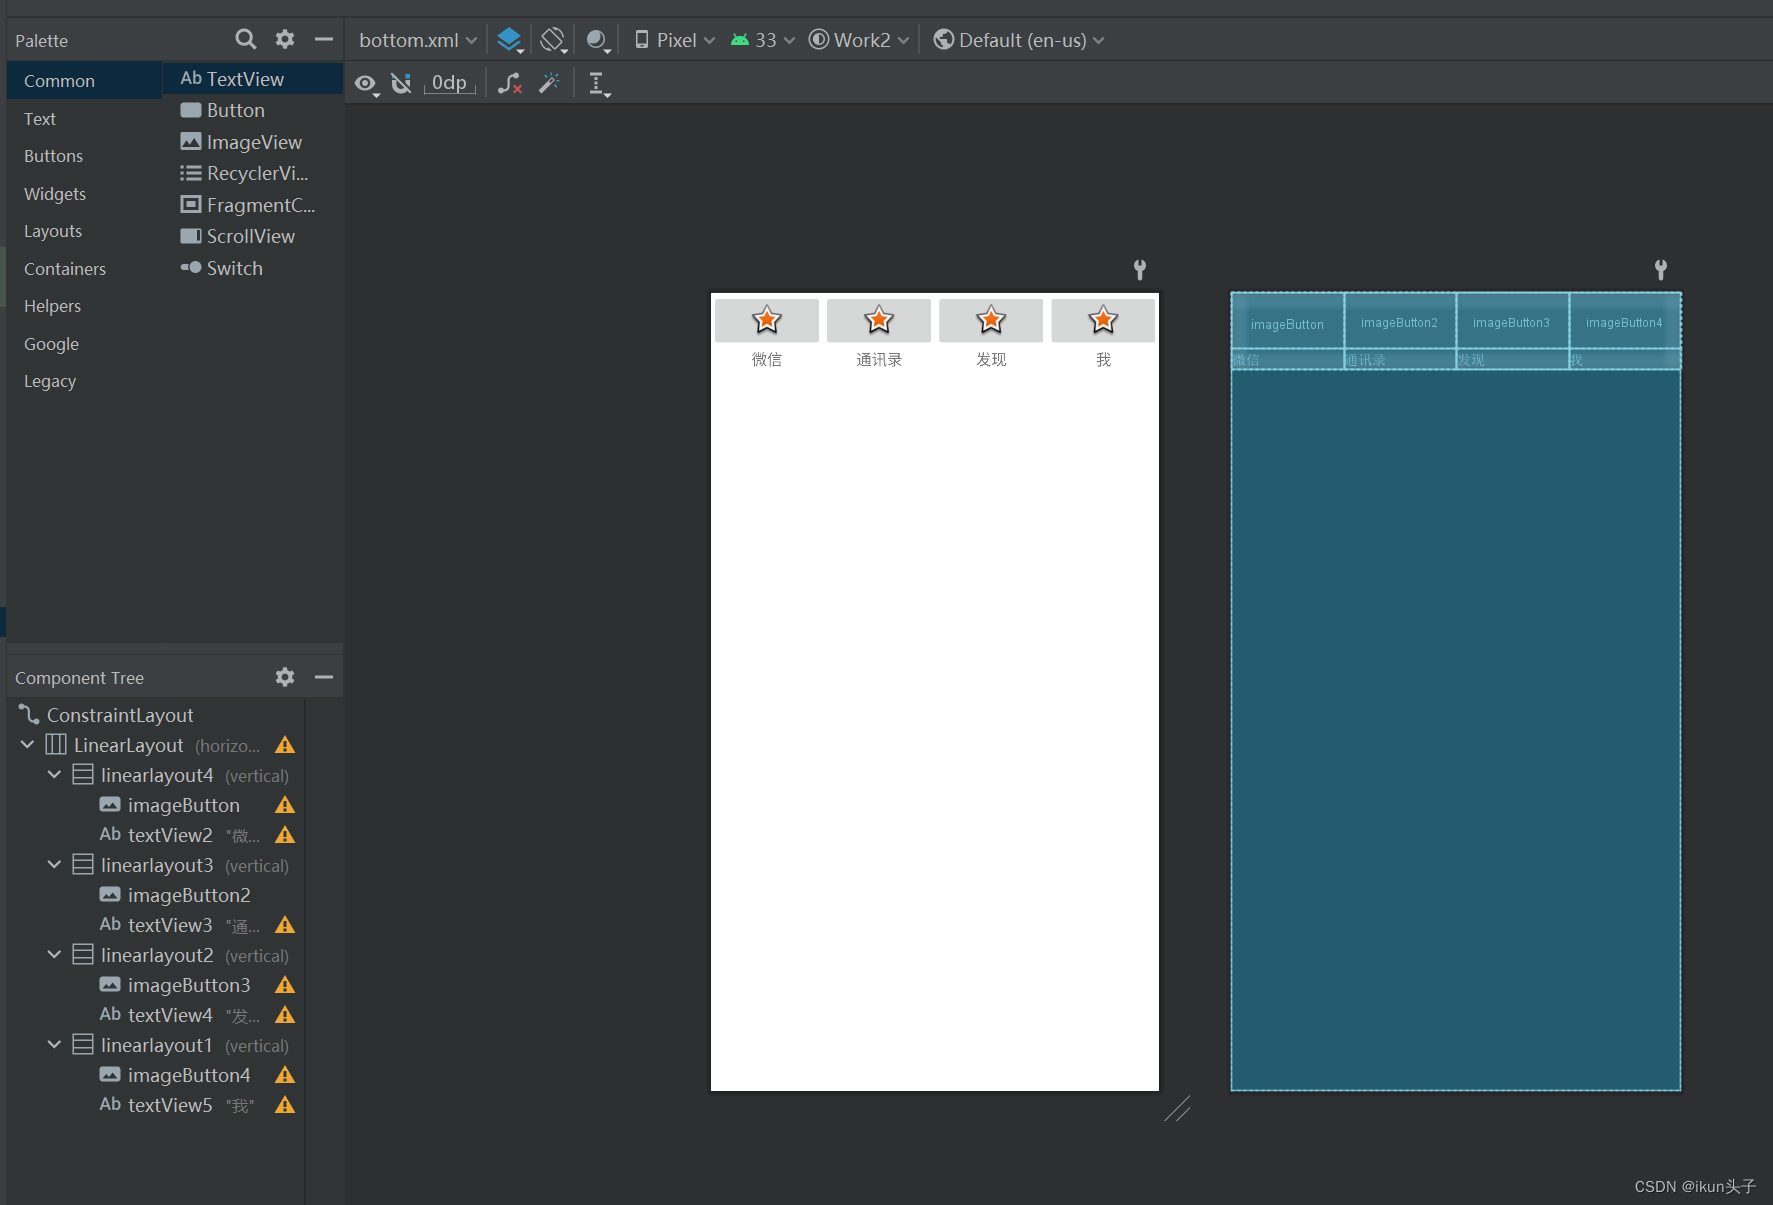
2.制作bottom.xml
代码展示(部分)
<LinearLayout
    android:id="@+id/linearlayout4"
    android:layout_width="match_parent"
    android:layout_height="wrap_content"
    android:layout_weight="1"
    android:orientation="vertical">


    <ImageButton
        android:id="@+id/imageButton"
        android:layout_width="match_parent"
        android:layout_height="wrap_content"
        android:layout_weight="1"
        android:contentDescription="@string/app_name"
        app:srcCompat="@android:drawable/star_big_on" />

    <TextView
        android:id="@+id/textView2"
        android:layout_width="match_parent"
        android:layout_height="wrap_content"
        android:layout_gravity="center"
        android:layout_weight="1"
        android:gravity="center"
        android:text="微信" />
3.写fragment.xml
按要求我们需要做四个tab界面应该新建四个fragment Java文件并生成相对应的xml文件
代码(部分)
import android.os.Bundle;
import android.view.LayoutInflater;
import android.view.View;
import android.view.ViewGroup;

import androidx.fragment.app.Fragment;

public class fragment1 extends Fragment {

    // TODO: Rename parameter arguments, choose names that match
    // the fragment initialization parameters, e.g. ARG_ITEM_NUMBER


    @Override
    public View onCreateView(LayoutInflater inflater, ViewGroup container,
                             Bundle savedInstanceState) {
        // Inflate the layout for this fragment
        return inflater.inflate(R.layout.fragment_1, container, false);
    }
}
4.将其写入activity.main.xml中
<?xml version="1.0" encoding="utf-8"?>
<androidx.constraintlayout.widget.ConstraintLayout xmlns:android="http://schemas.android.com/apk/res/android"
    xmlns:app="http://schemas.android.com/apk/res-auto"
    xmlns:tools="http://schemas.android.com/tools"
    android:layout_width="match_parent"
    android:layout_height="match_parent"
    tools:context=".MainActivity">

    <include
        android:id="@+id/include1"
        layout="@layout/top"
        android:layout_width="match_parent"
        android:layout_height="wrap_content"
        app:layout_constraintEnd_toEndOf="parent"
        app:layout_constraintStart_toStartOf="parent"
        app:layout_constraintTop_toTopOf="parent" />

    <FrameLayout
        android:id="@+id/framelayout1"
        android:layout_width="410dp"
        android:layout_height="638dp"
        app:layout_constraintBottom_toBottomOf="@+id/include2"
        app:layout_constraintEnd_toEndOf="parent"
        app:layout_constraintHorizontal_bias="0.0"
        app:layout_constraintStart_toStartOf="parent"
        app:layout_constraintTop_toBottomOf="@+id/include1"
        app:layout_constraintVertical_bias="0.0">

    </FrameLayout>

    <include
        android:id="@+id/include2"
        layout="@layout/bottom"
        android:layout_width="match_parent"
        android:layout_height="wrap_content"
        app:layout_constraintBottom_toBottomOf="parent"
        app:layout_constraintEnd_toEndOf="parent"
        app:layout_constraintStart_toStartOf="parent" />
5.最后对main文件进行编写
import androidx.appcompat.app.AppCompatActivity;
import androidx.fragment.app.FragmentManager;
import androidx.fragment.app.Fragment;
import androidx.fragment.app.FragmentTransaction;
import android.view.View;

import android.os.Bundle;

import android.widget.LinearLayout;


public class MainActivity extends AppCompatActivity implements View.OnClickListener {
    private Fragment Fragment1,Fragment2,Fragment3,Fragment4;
    private LinearLayout linearlayout1,linearlayout2,linearlayout3,linearlayout4;
    private FragmentTransaction transaction;
    private FragmentManager manager;

    @Override
    protected void onCreate(Bundle savedInstanceState) {
        super.onCreate(savedInstanceState);
        setContentView(R.layout.activity_main);
        Fragment1=new fragment1();
        Fragment2=new fragment2();
        Fragment3=new fragment3();
        Fragment4=new fragment4();
        manager=getSupportFragmentManager();
        initial();

        hidden();

        linearlayout1=findViewById(R.id.linearlayout1);
        linearlayout2=findViewById(R.id.linearlayout2);
        linearlayout3=findViewById(R.id.linearlayout3);
        linearlayout4=findViewById(R.id.linearlayout4);
        linearlayout1.setOnClickListener(this);
        linearlayout2.setOnClickListener(this);
        linearlayout3.setOnClickListener(this);
        linearlayout4.setOnClickListener(this);
    }

    private void initial() {

        FragmentTransaction transaction=manager.beginTransaction()

                .add(R.id.framelayout1,Fragment1)

                .add(R.id.framelayout1,Fragment2)

                .add(R.id.framelayout1,Fragment3)

                .add(R.id.framelayout1,Fragment4);

        transaction.commit();

    }

    private void select(int i) {

        hidden();

        switch (i){

            case 1:showfragment(Fragment1);

                break;

            case 2:showfragment(Fragment2);;

                break;

            case 3:showfragment(Fragment3);;

                break;

            case 4:showfragment(Fragment4);;

                break;

        }

    }

    private void showfragment(Fragment fragment) {

        transaction.show(fragment);

    }

    private void hidden() {

        transaction=manager.beginTransaction()

                .hide(Fragment1)

                .hide(Fragment2)

                .hide(Fragment3)

                .hide(Fragment4);

        transaction.commit();

    }

    @Override
    public void onClick(View view) {
        switch (view.getId()){
            case R.id.linearlayout1:
                select(1);
                break;
            case R.id.linearlayout2:
                select(2);
                break;
            case R.id.linearlayout3:
                select(3);
                break;
            case R.id.linearlayout4:
                select(4);
                break;

        }

    }

}
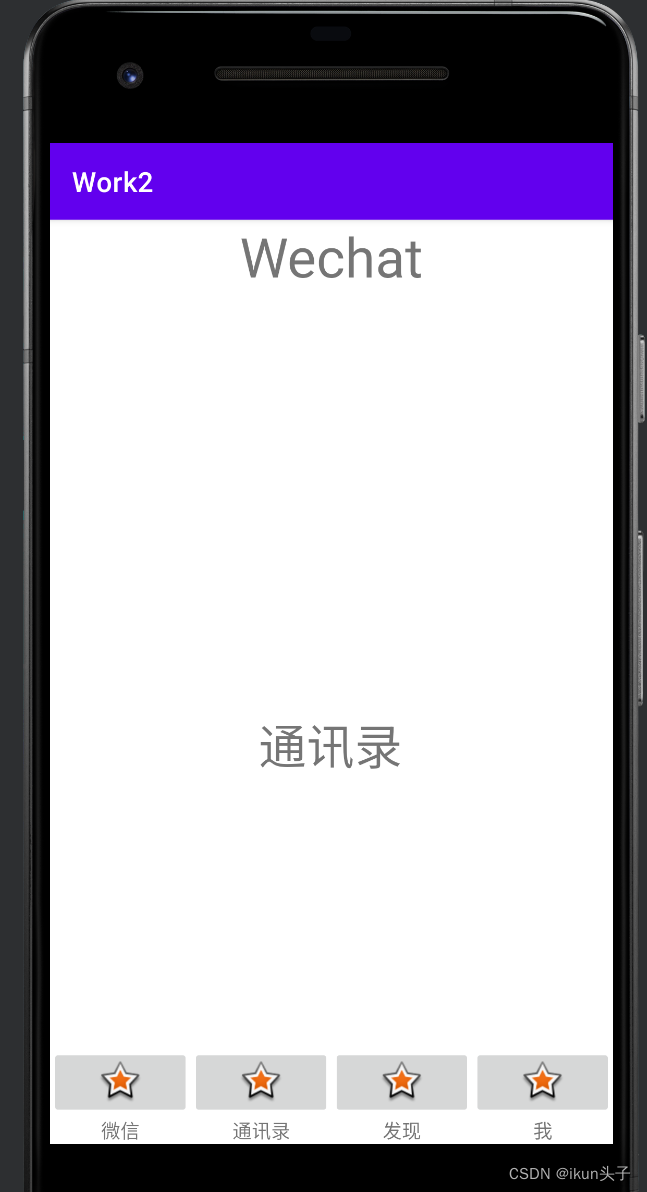
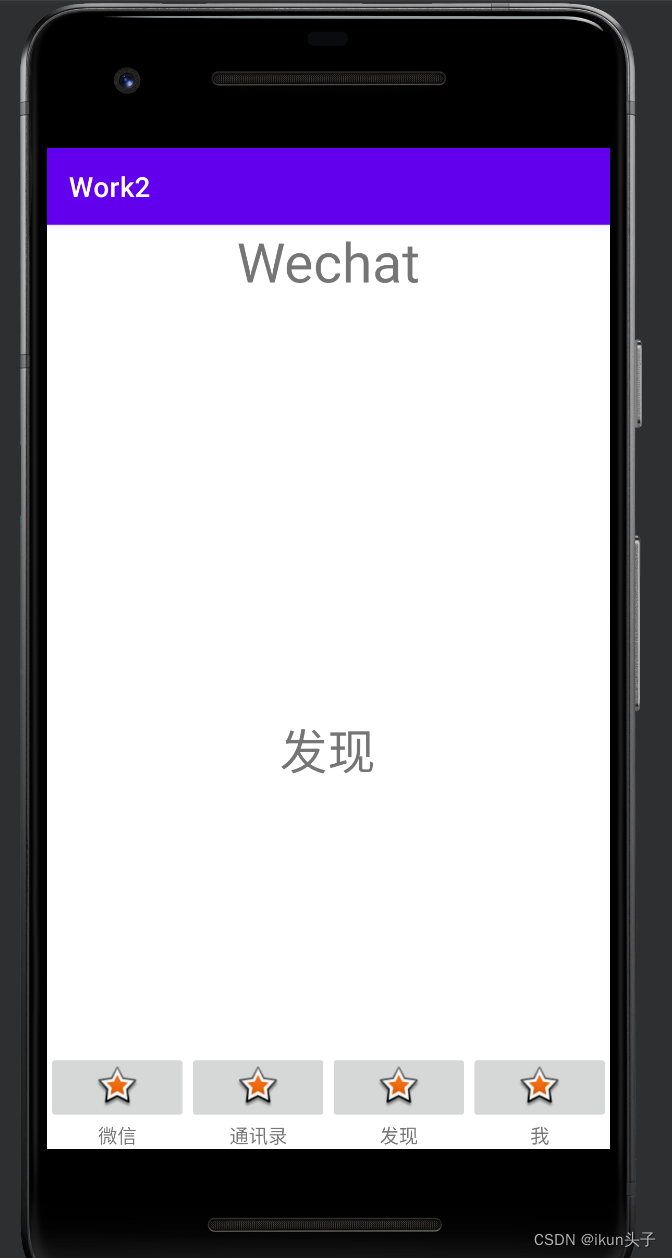
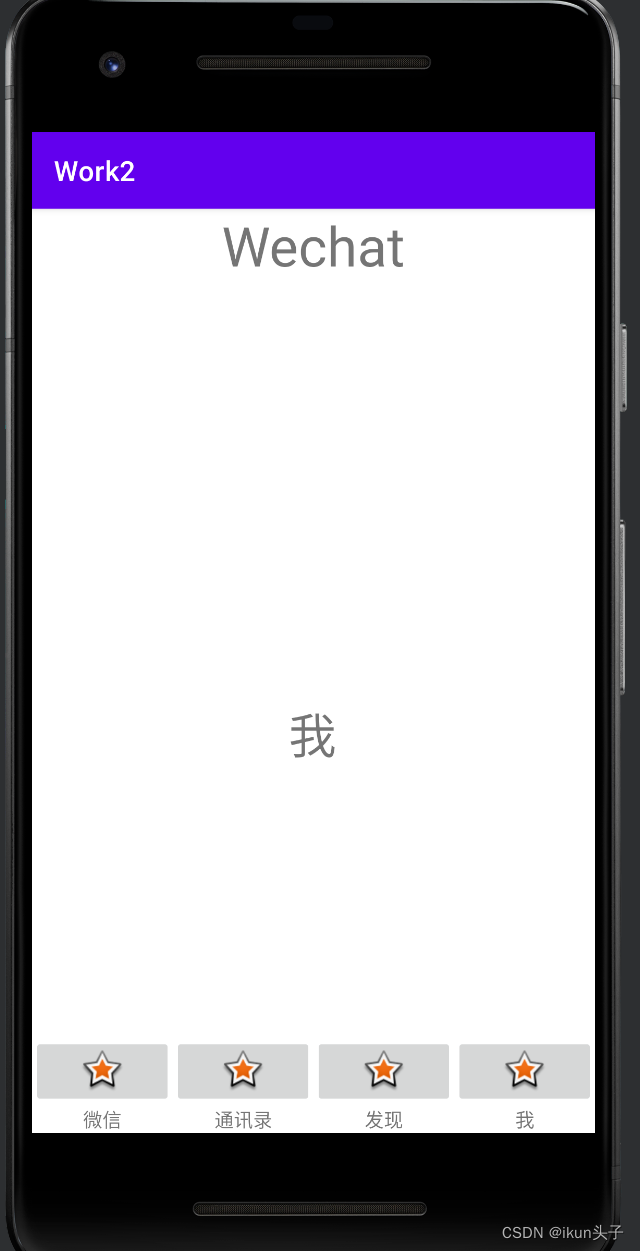
运行截图展示


 3万+
3万+


 暂无认证
暂无认证


 被折叠的 条评论
为什么被折叠?
被折叠的 条评论
为什么被折叠?
 到【灌水乐园】发言


